Automate XCTests with GitHub Actions
Ever since GitHub introduced GitHub Actions in 2018, developers now have a powerful tool to create complex pipelines for CI/CD without the need to rely on third-party software.
If you’ve worked on a project with a team composed of multiple people, you know that a lot of things can go wrong. A lot of code can break with a single commit pushed/merged by mistake or a commit made by a user who was not paying much attention to other people’s code.
The most obvious way to overcome this is to create a solid test suite that will increase in time and tell you if something is broken and needs fixing or if your code fits well with the previous code.
Tests can vary a lot, and as your project grows, your test suite will too. There are UI and unit tests, and each one of those will need to be tested on different devices with different scenarios. Who wants to wait 15 minutes for your tests to finish running? GitHub Actions are here to rescue us and will do the work.
From here on out, I’m going to use some tests from my test app that is called TestApp.
Let’s first create a .yml file that is going to contain our XCTest workflow. I’m calling it xctest-workflow.yml and it needs to be put in the .github/workflows folder in order for GitHub to recognize and execute it.
This is how the workflow is going to look:
name: iOS Test Workflow
on:
  push:
    branches:
      - master
  pull_request:
    branches:
      - master
jobs:
  build:
    name: Build and Test default scheme using iPhone/iPad simulator
    runs-on: macos-latest
    steps:
      - name: Checkout
        uses: actions/checkout@v2
      - name: Force Xcode 11
        run: sudo xcode-select -switch /Applications/Xcode_11.7.app
      - name: iOS build setup
        run: >-
          xcodebuild test -workspace TestApp.xcodeproj/project.xcworkspace
          -scheme TestApp -destination 'platform=iOS Simulator,name=iPhone
          11,OS=13.7'
      - name: testing ... iPhone 11
        run: >-
          xcodebuild test -workspace TestApp.xcodeproj/project.xcworkspace
          -scheme TestApp -destination 'platform=iOS Simulator,name=iPhone
          11,OS=13.7'
      - name: testing ... iPhone 11 Pro Max
        run: >-
          xcodebuild test -workspace TestApp.xcodeproj/project.xcworkspace
          -scheme TestApp -destination 'platform=iOS Simulator,name=iPhone 11
          Pro Max,OS=13.7'
      - name: testing ... iPad Air
        run: >-
          xcodebuild test -workspace TestApp.xcodeproj/project.xcworkspace
          -scheme TestApp -destination 'platform=iOS Simulator,name=iPad Air
          (3rd generation),OS=13.7'
      - name: testing ... iPad Pro 12.9
        run: >-
          xcodebuild test -workspace TestApp.xcodeproj/project.xcworkspace
          -scheme TestApp -destination 'platform=iOS Simulator,name=iPad Pro
          (12.9-inch) (4th generation),OS=13.7'
Workflow Definition
On lines 1-8, we’re giving a name to the workflow itself and instructing that it should run every time there is a push to the master branch or a pull request has been issued on the master branch. You can add more branches or customise when you want it to run. Check out all the possible events in the GH Actions docs.
Workflow Job
On lines 9-41, we’re defining what is actually going to be your workflow. In this snippet, I’m keeping stuff simple, but you can define more jobs to run on the events specified on lines 1-5. Read more about this in the GH Actions docs.
As you can see, I’m calling the job build and instructing that it should run
on a macOS operating system. Immediately after that, I’m defining five different
steps that will test my code on five different iOS devices.
The core command here is:
$ xcodebuild test \
    -workspace TestApp.xcodeproj/project.xcworkspace \
    -scheme TestApp \
    -destination 'platform=iOS Simulator, name=iPad Air (3rd generation),OS=13.7'
This command is going to test all the code contained in my test suite on an iPad Air simulator.
Push and Forget
Right now, if you’ve replicated all the steps correctly, you should see something in the Actions panel as soon as you push/pull request stuff to your master branch:
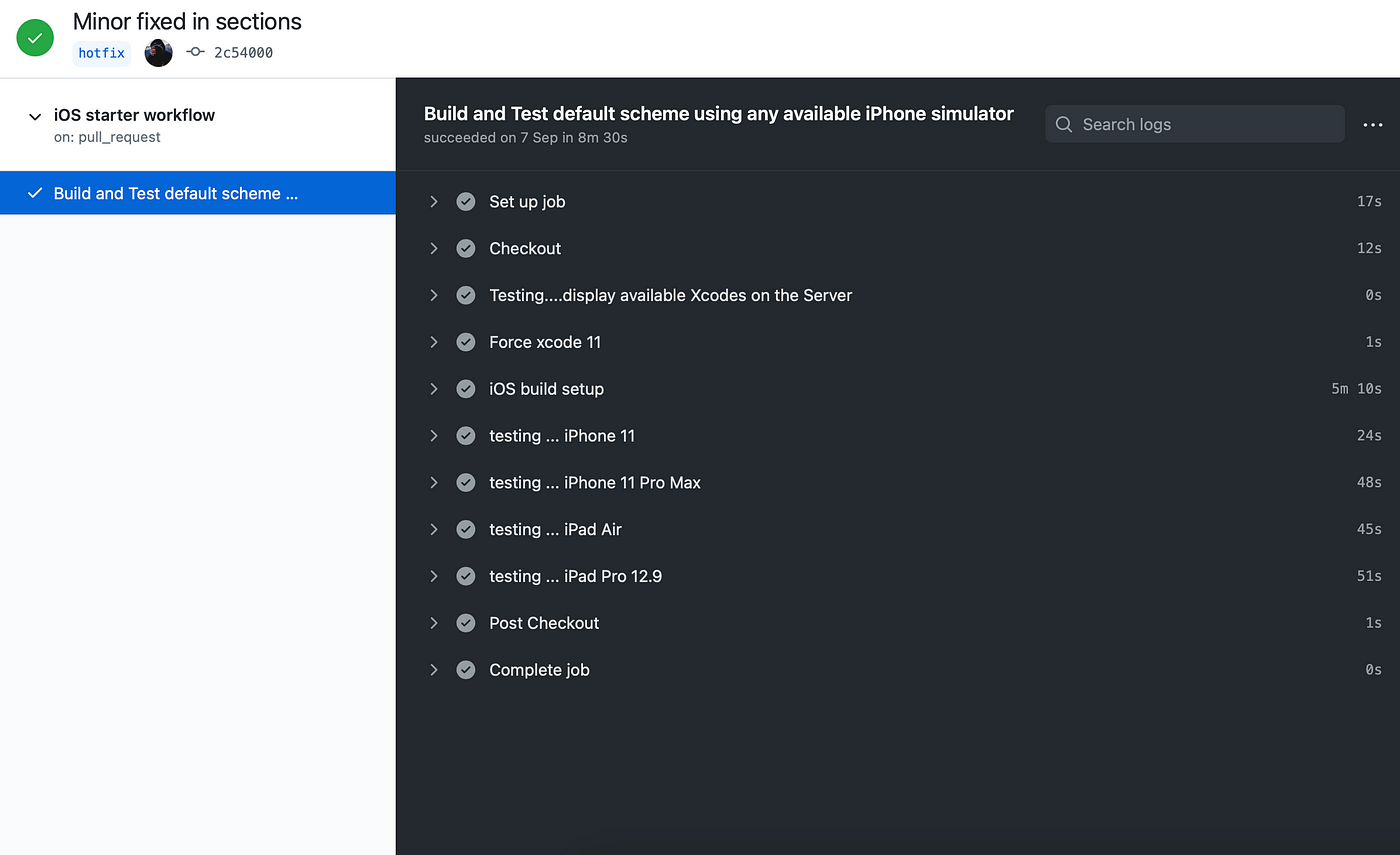
If your run is successful, you should see a checkmark next to all the steps. What’s really useful is that, in case your run fails, GitHub Actions will instantly notify you by email that your job has failed. So if you’re pushing stuff to a remote server just before leaving work and you don’t receive an email during the commute, you’ll know that everything went fine.
Conclusion
In this article, I’ve just scratched the surface of what you can do with GitHub Actions. I’ll definitely cover more advanced stuff in the future, but for the moment, I hope you’ve enjoyed your introduction to CI automation.